Hello everyone, welcome to the second part of my Level 1 Final Challenge final for the Altenew Educator Certification Program (AECP). I will now show you the Masculine card set that I have created. I hope you will also check out the Feminine card set in the previous blog. As I stated in that blog posting I will be waiting on baited breath to see if I pass this level and move on to Level 2 and the challenges associated with that level.
As I explained in the previous post for the Feminine card set, I was challenged to make 2 card sets and to use 3 different concepts from the Level 1 AECP classes as a design element. I am using the same 3 classes that I did for the Feminine card set. Easy Ink Blending Techniques for ink blending on individual card panels and through die-cut stencils and emboss resist. Easy Die Cutting Techniques for die cut sentiments, cover dies to add interest to backgrounds, and dies to dry emboss backgrounds to create dimension. Let It Shine for adding shine to all of the masculine cards with Altenew embossing powders for that very metallic cohesive look.
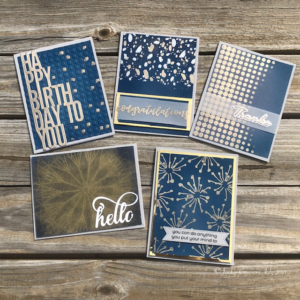
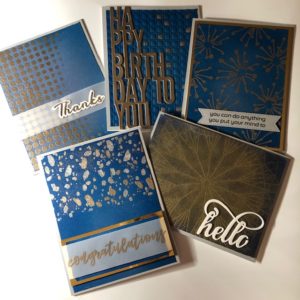
It is time to share my AECP Level 1 Masculine Card Set with you. I hope these 5 cards will provide inspiration to you and spark excitement and joy in your life and those you create for.
I wanted my masculine card set to be very cohesive with navy blue and metallic components. I also incorporated the same gray cardstock I used for the Feminine card set. I designed 5 cards and used various techniques from the 3 concepts I described above.
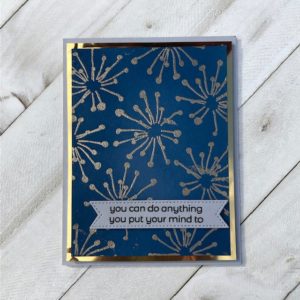
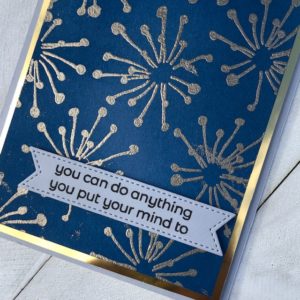
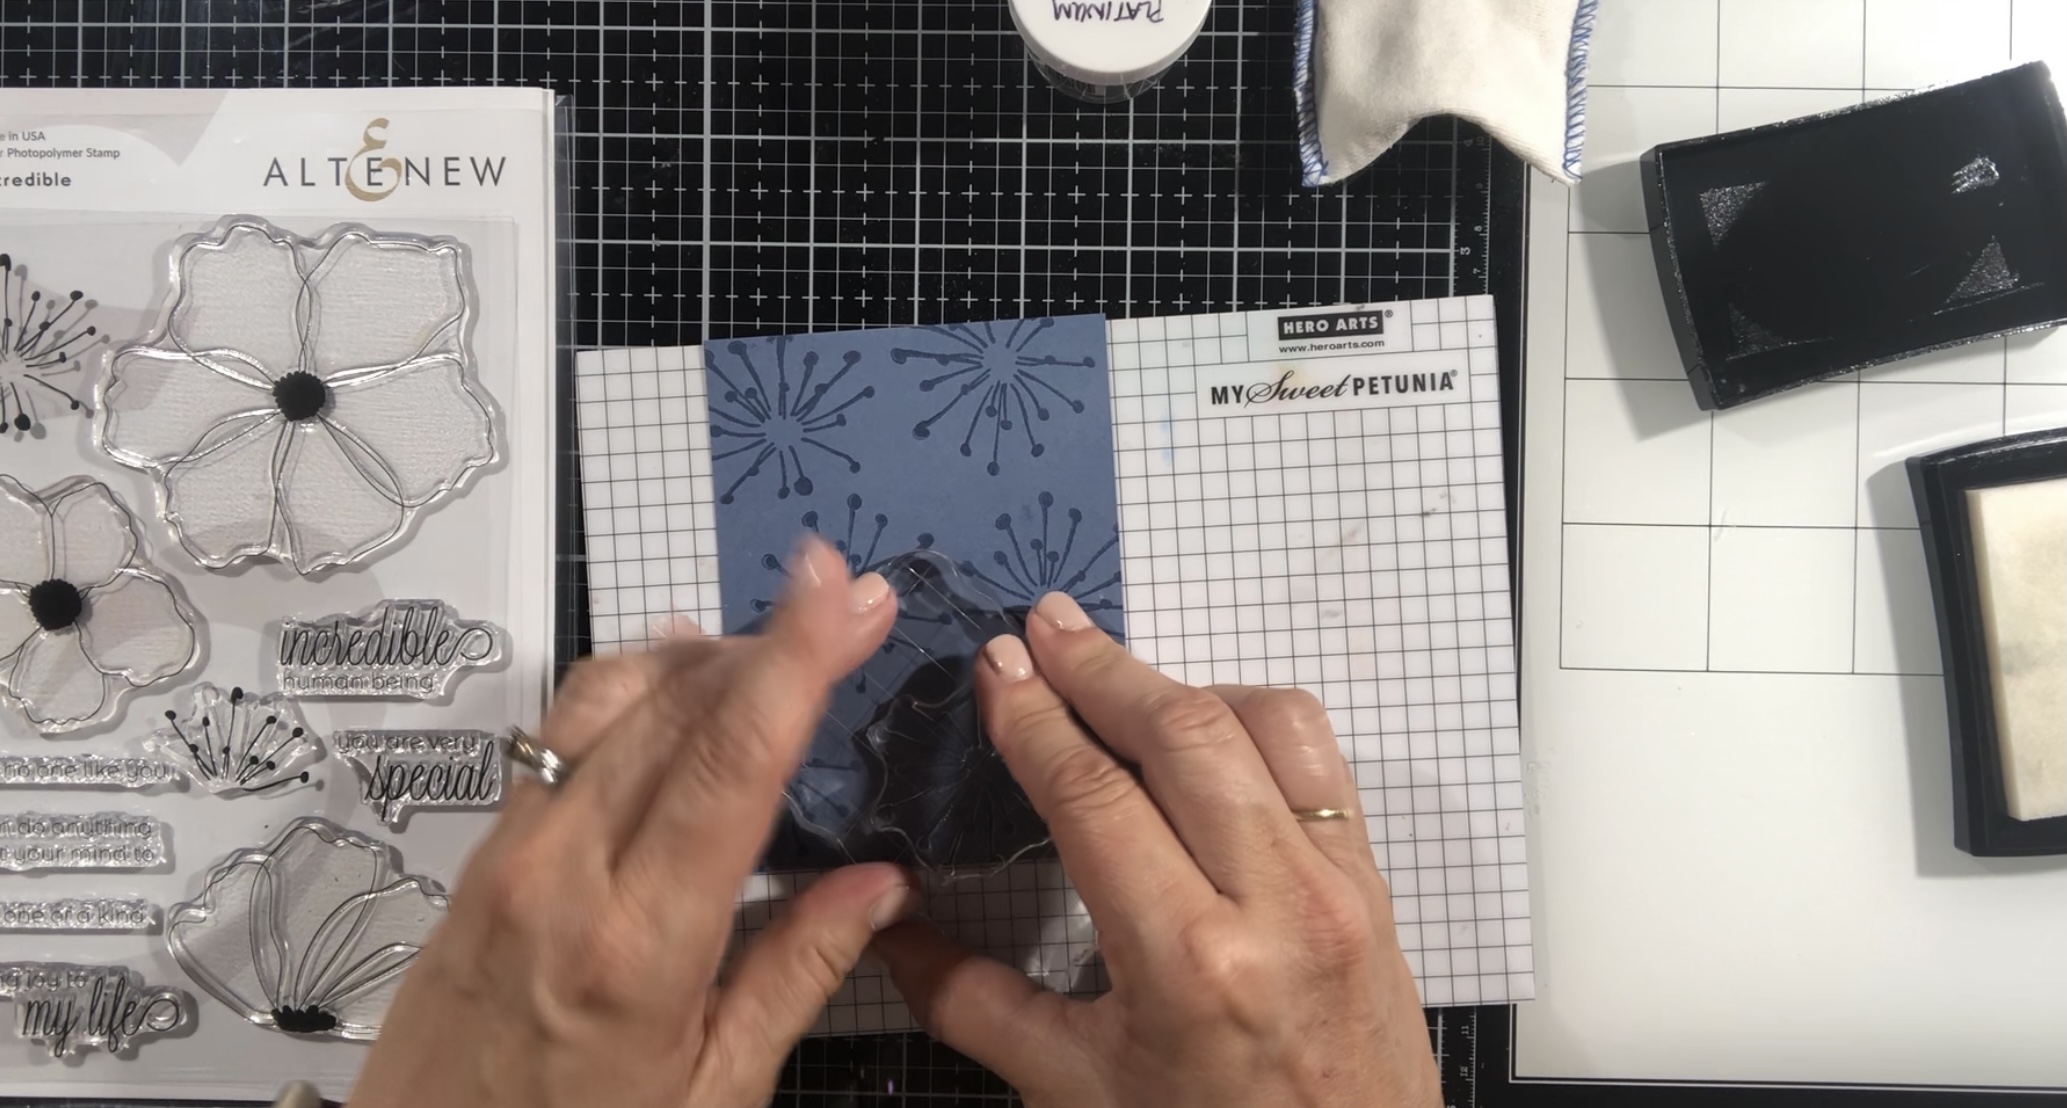
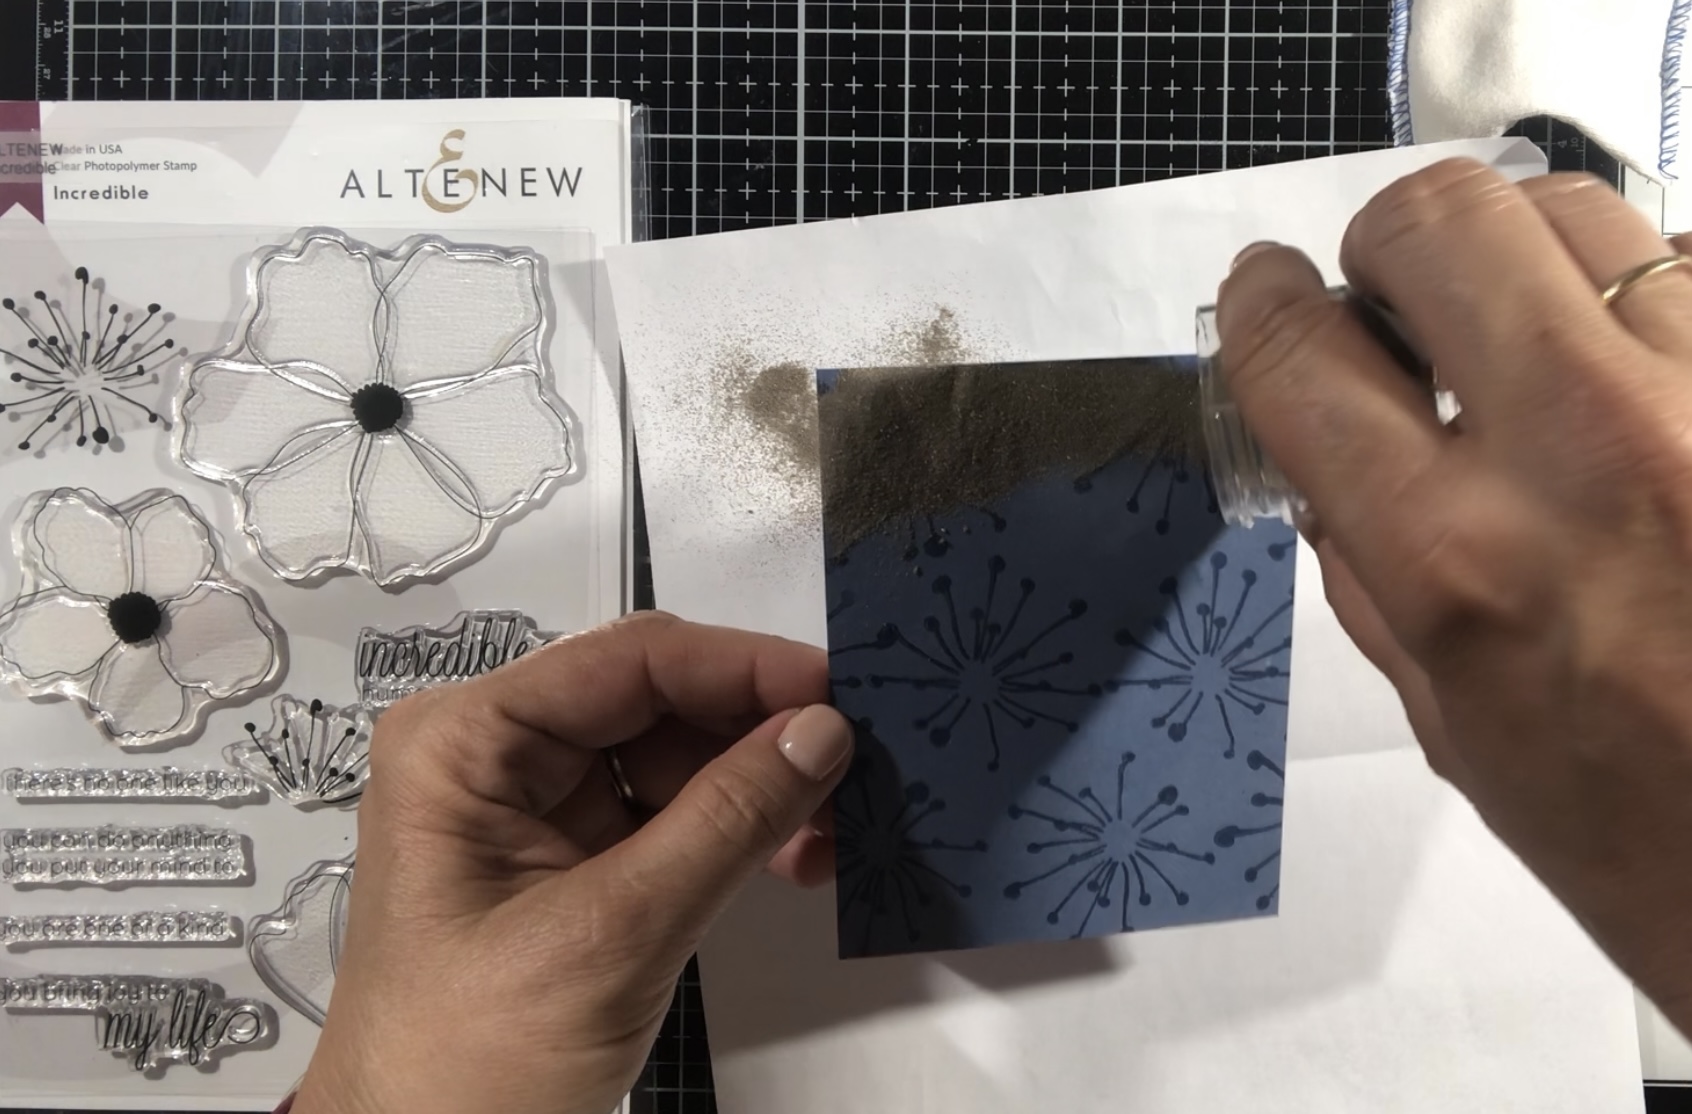
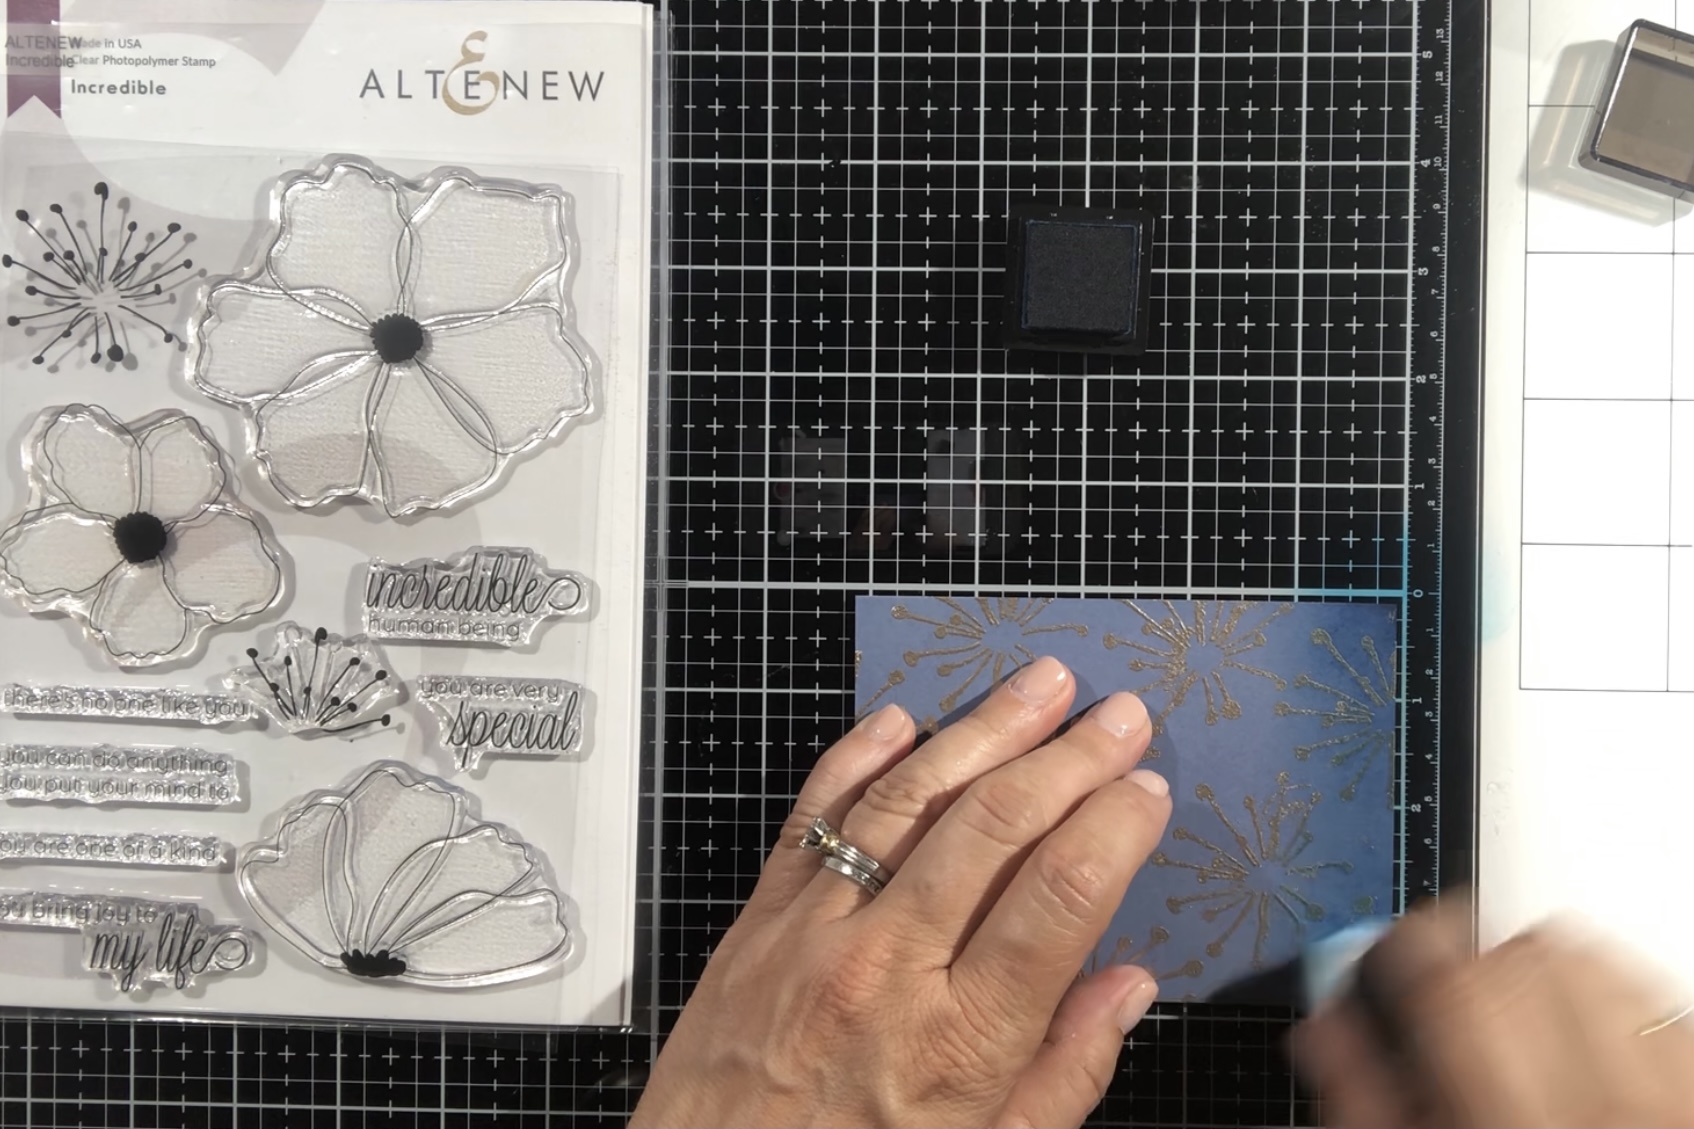
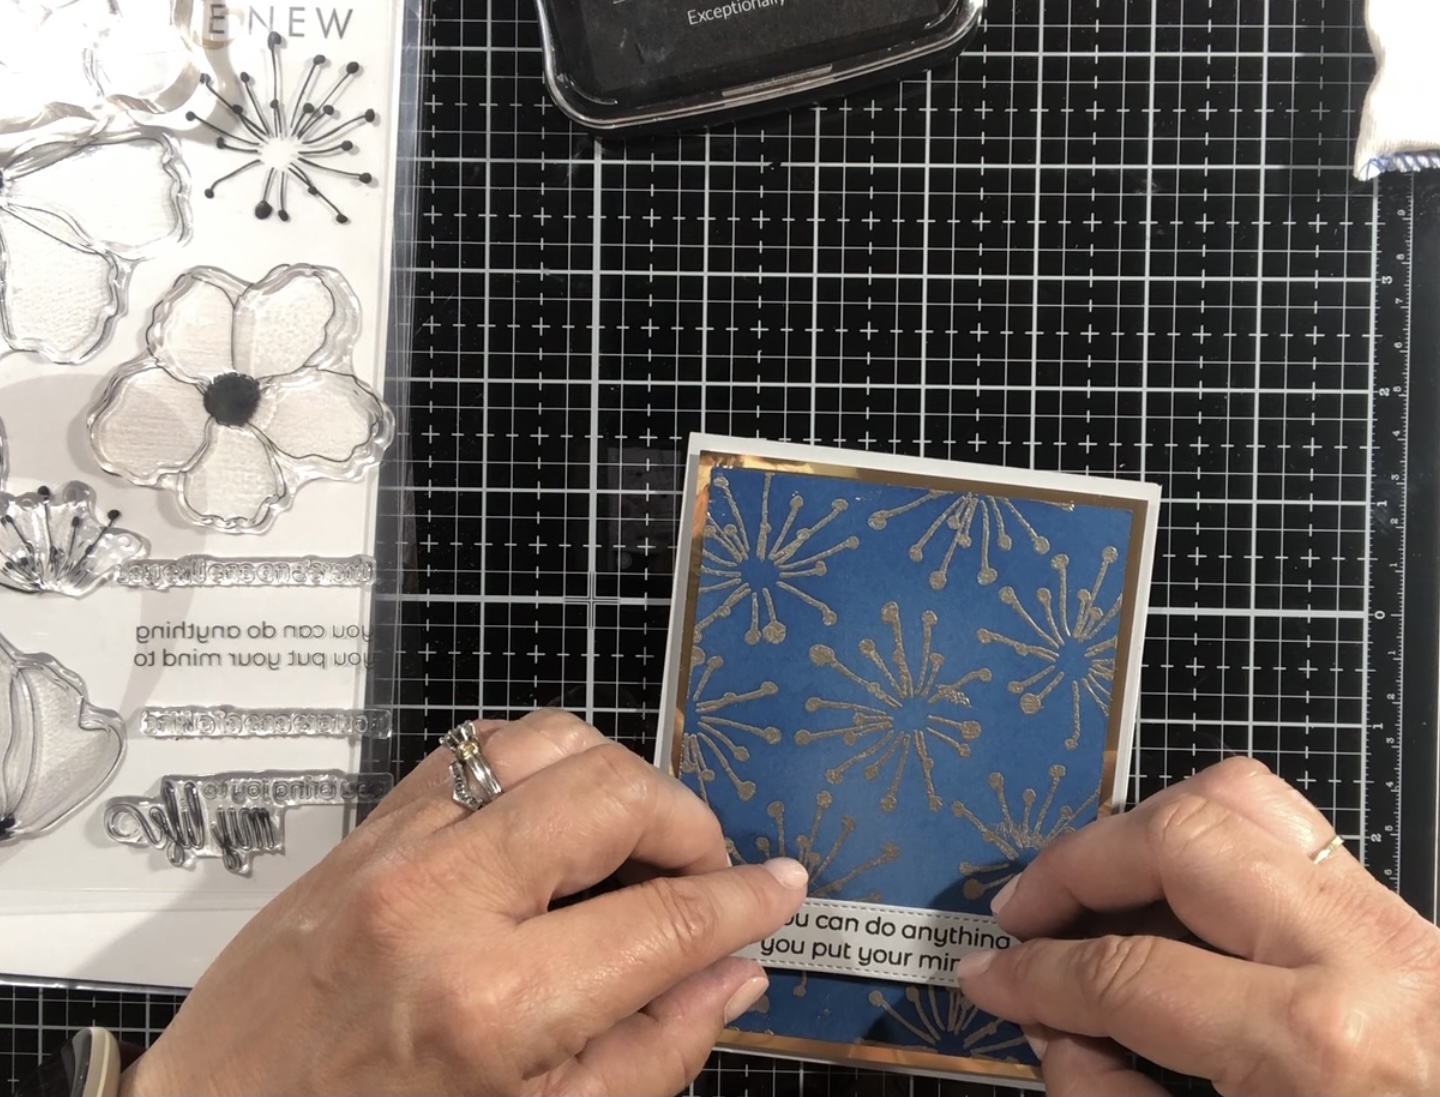
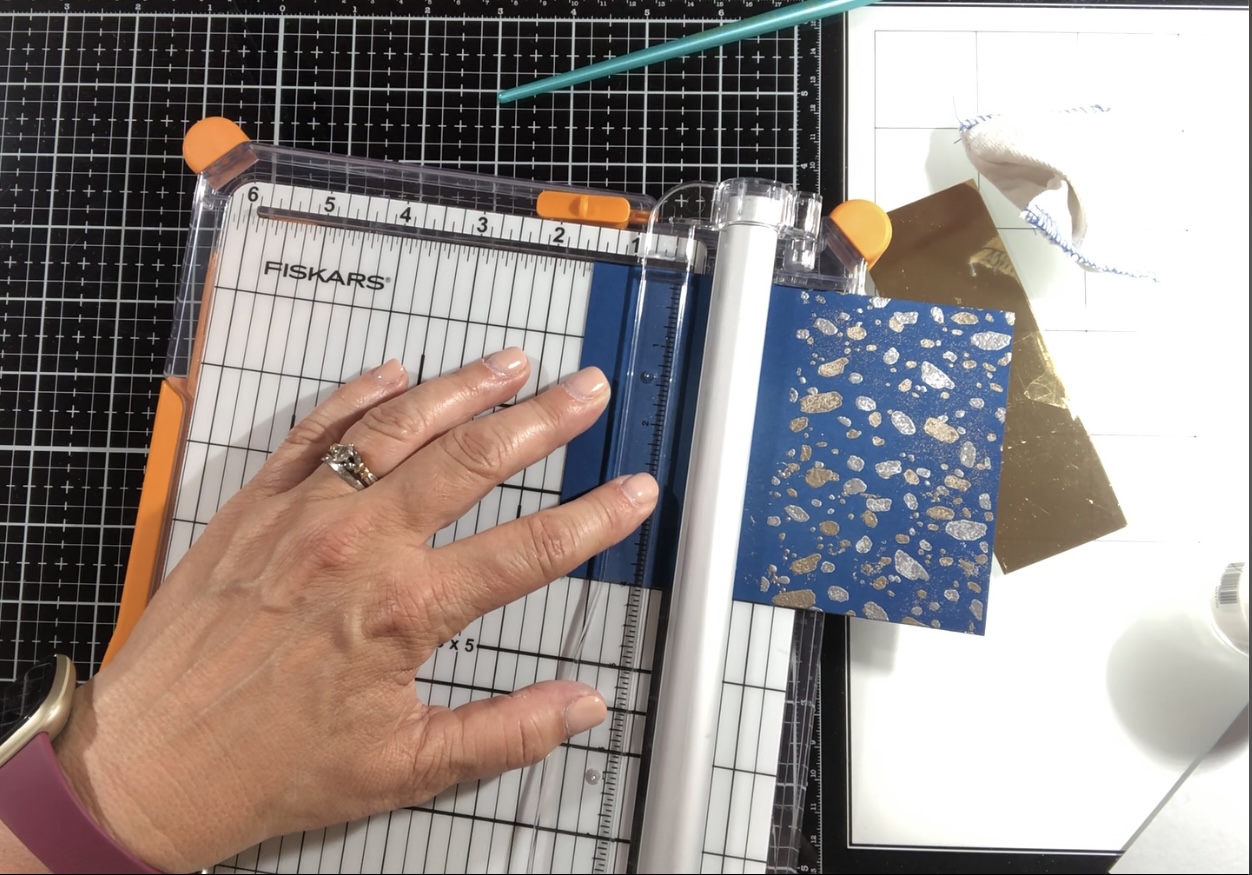
The YOU CAN DO ANYTHING card was inspired by the flower center from the Altenew Incredible Stamp Set. It made me think of fireworks when stamped on its own. I brought this fireworks display together by stamping randomly all over the navy blue cardstock panel with Versa Mark embossing ink. I then heat embossed the pattern with Altenew's Platinum embossing powder. A handy tip, for the gold border below the navy panel I cut out a 4″x5.25″ panel but then cut the center out of the panel so I I could use the treasured metallic cardstock on another project. Ink blending was completed with Altenew’s Starlight ink with a heavier concentration of color around the panel edges. I popped the panel up with foam and added to a 4.25″x5″ gray card stock panel and then attached to an A2 Neenah Solar White 110# card base. My sentiment is also from the same stamp set and pops on the gray banner. Another tip is to use a microfiber cloth to wipe off any excess ink on your embossed images to shine them back up.
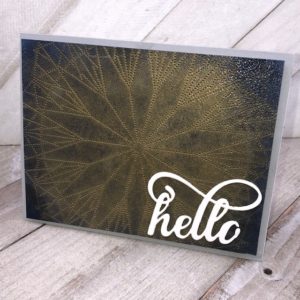
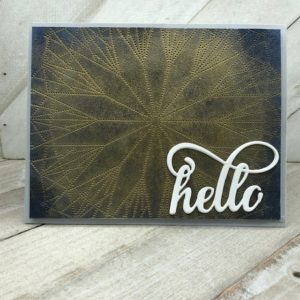
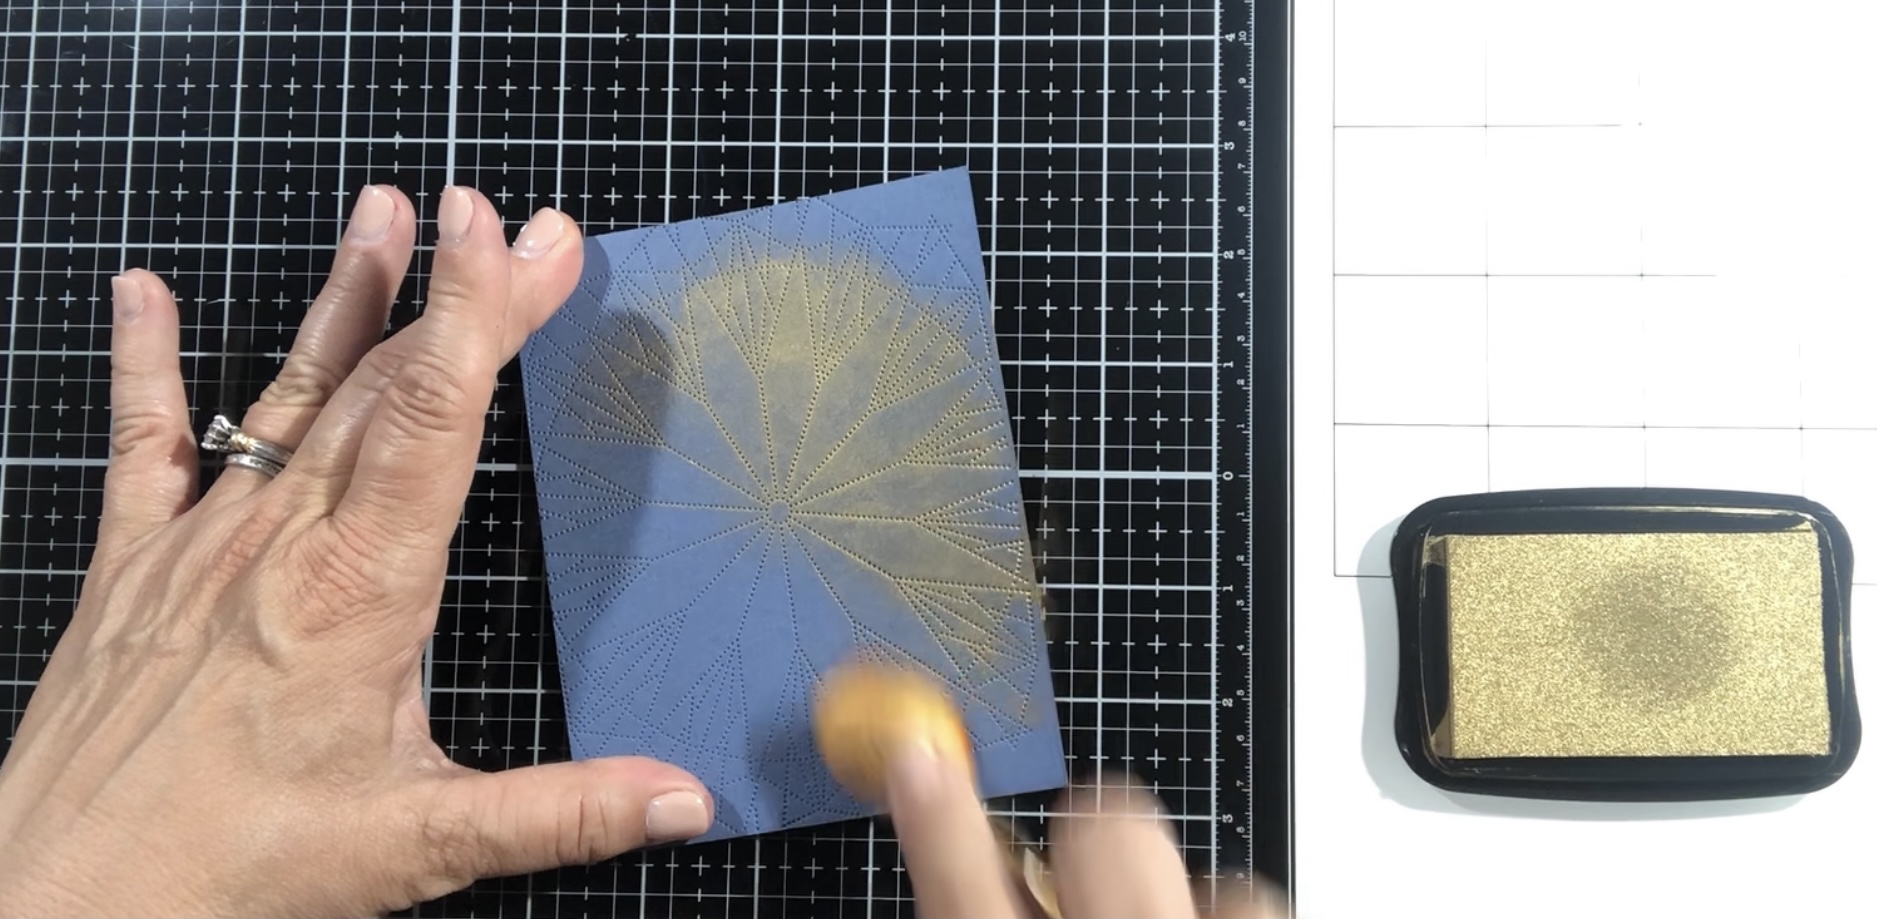
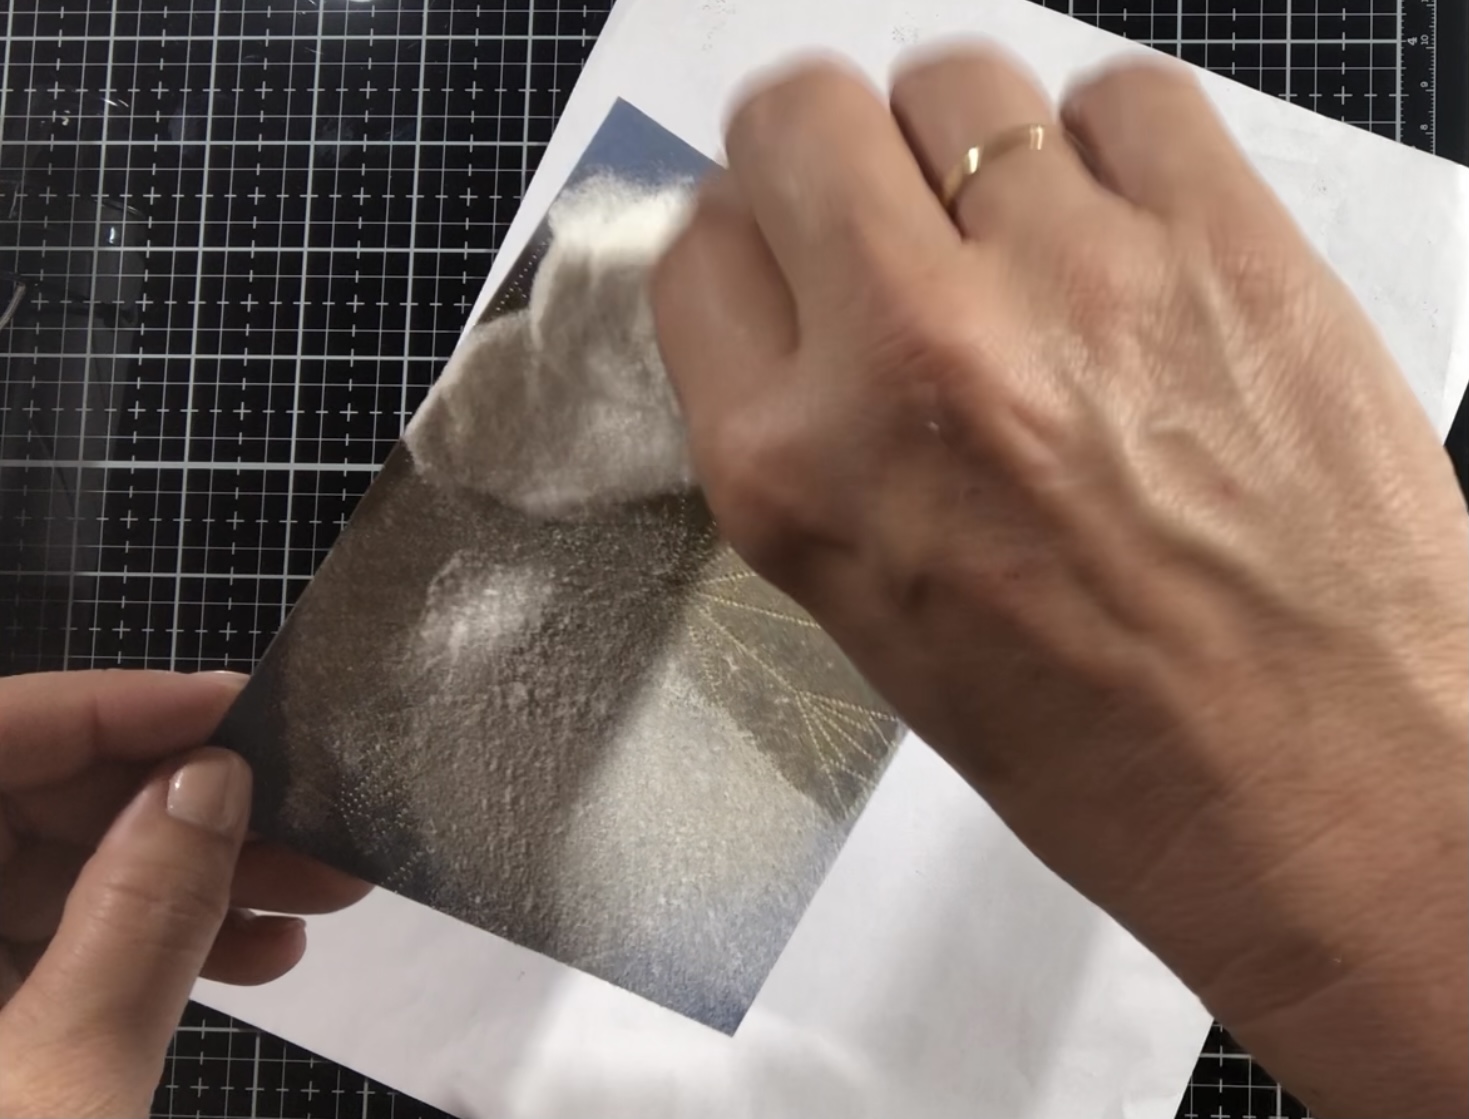
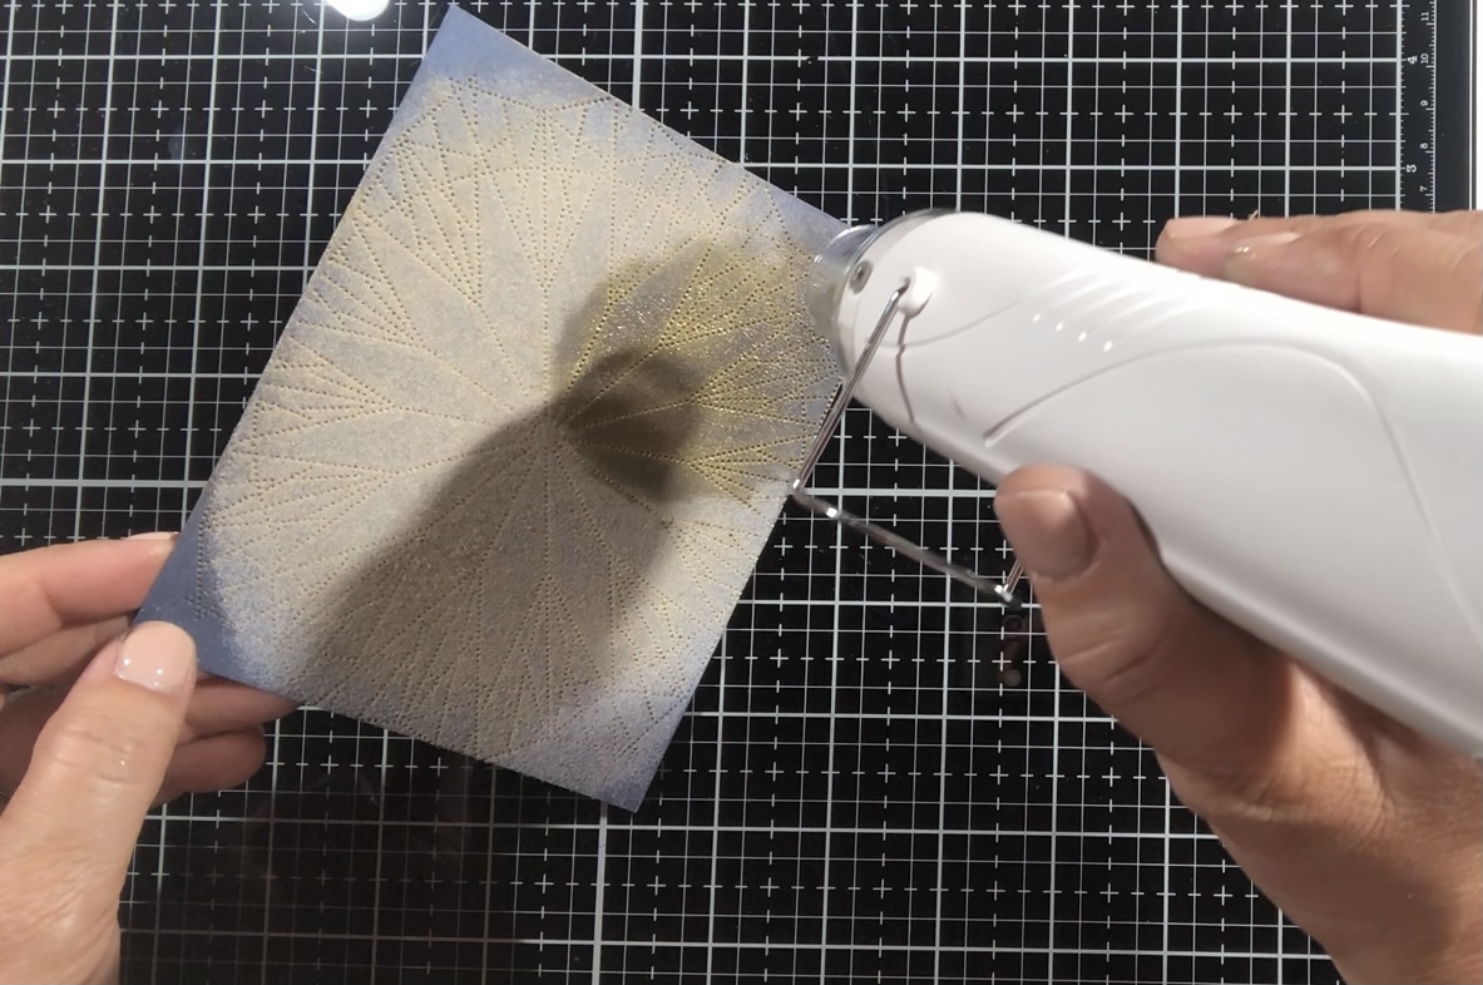
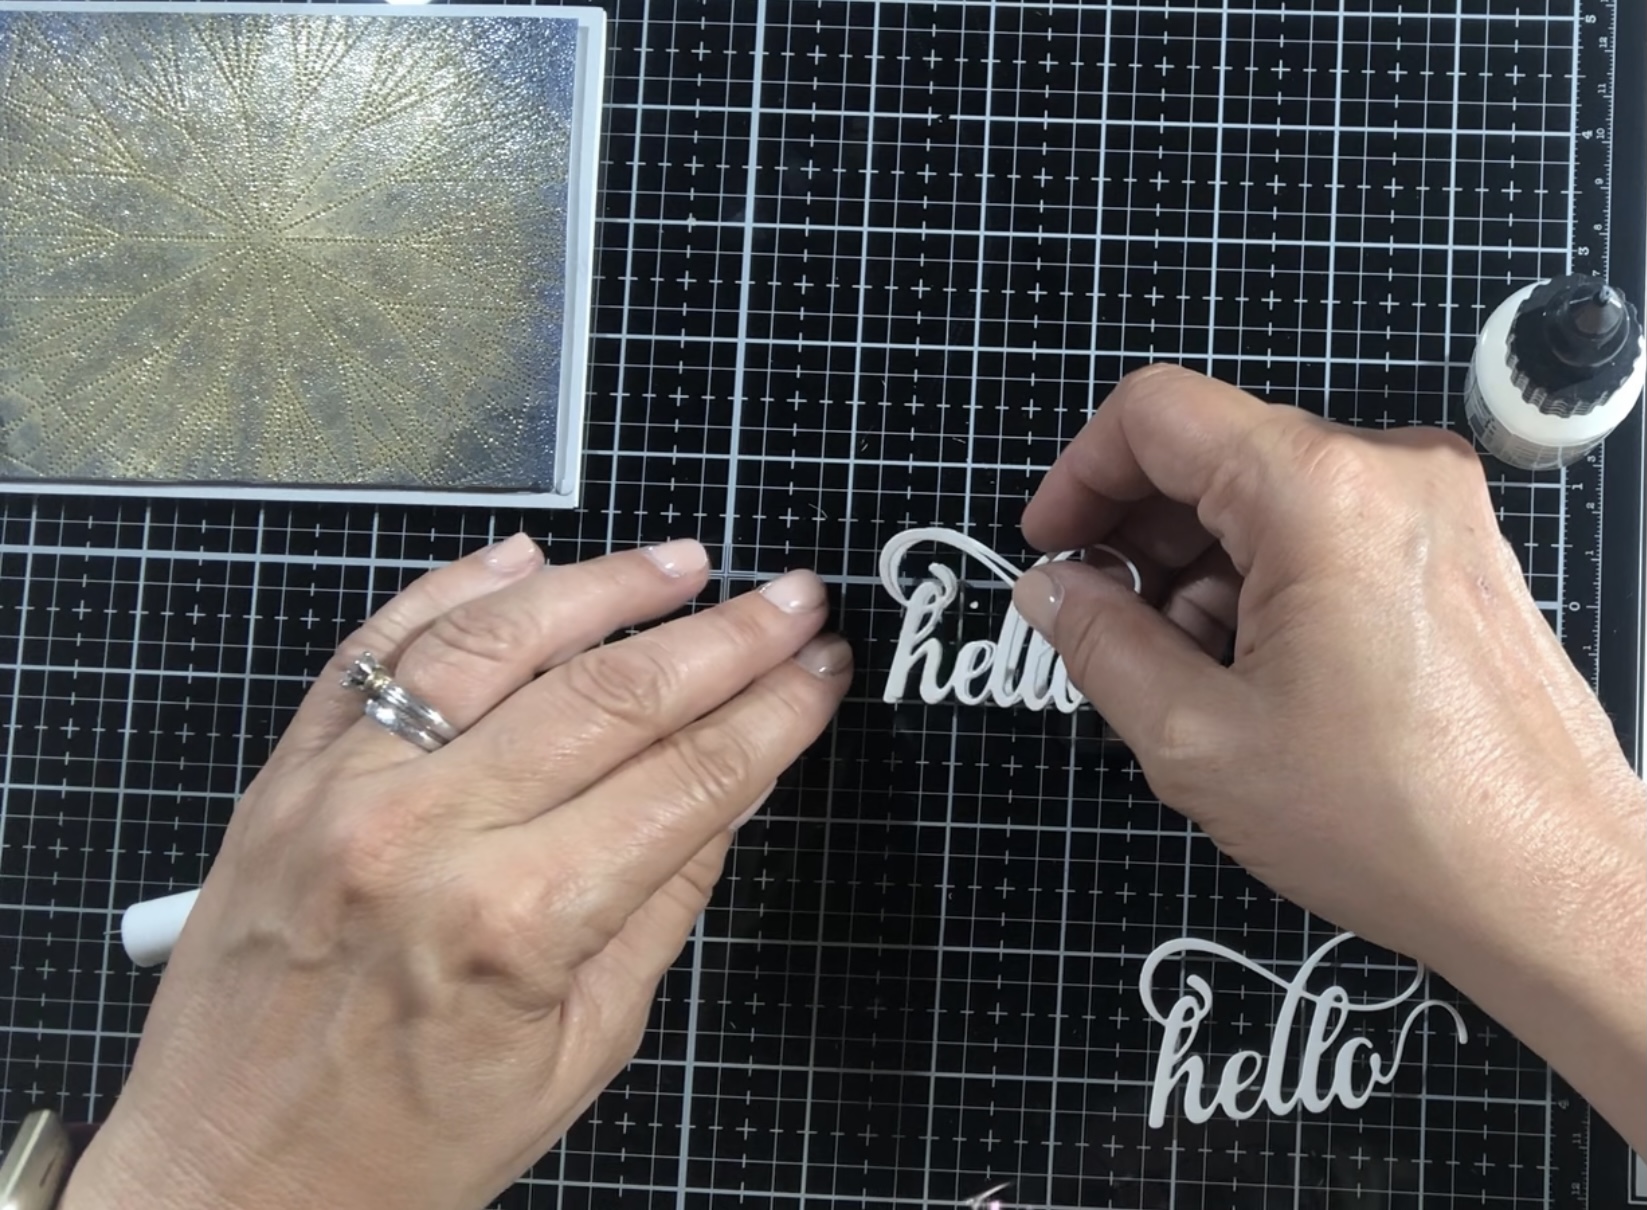
The HELLO card was an experiment to see how I could use my Altenew Antique Gold pigment ink to achieve a metallic finish as well. To begin I used Altenew's Dotted Lines Debossing Cover Die to create this amazing geometric shape on my 4″x5.25″ navy cardstock panel. The pigment ink was then blended over the debossed design for the metallic touch. I then applied Versa Mark embossing ink over the entire panel, including the areas I did not ink. Altenew's clear embossing powder was then applied to the entire panel and heat set, resulting in this very deep rich metallic finish. I used Altenew's Fancy Hello die to cut 3 of the sentiments onto white card stock and glued them into a stack to provide dimension. (note I did cut off the flourish at the end of the “o”). I then mounted this to a 4.25″x5.5″ gray cardstock panel with foam and glued it to an A2 Neenah Solar White 110# card base. This card screams masculine to me.
My next two cards are my favorite cards in this masculine set. The texture in the backgrounds truly make an impact. Again gray borders and the platinum embossing ties each of the cards together.
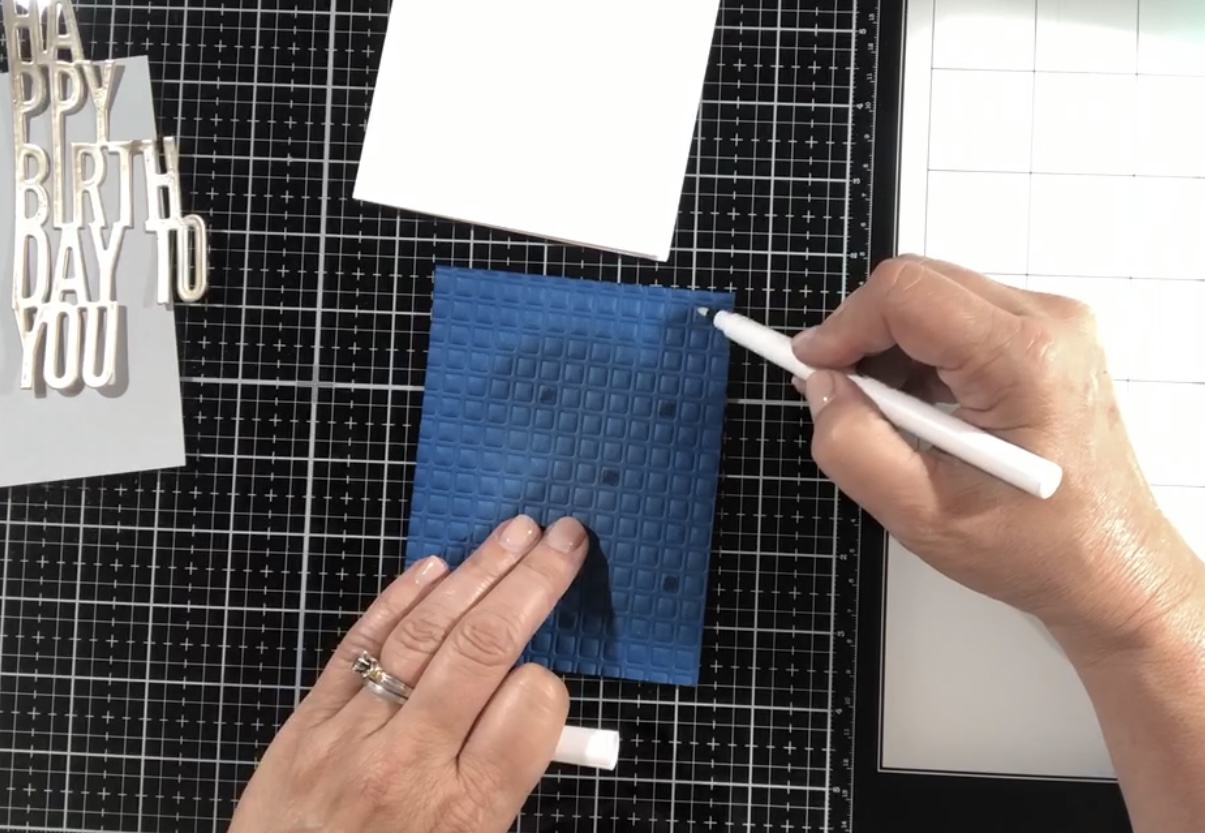
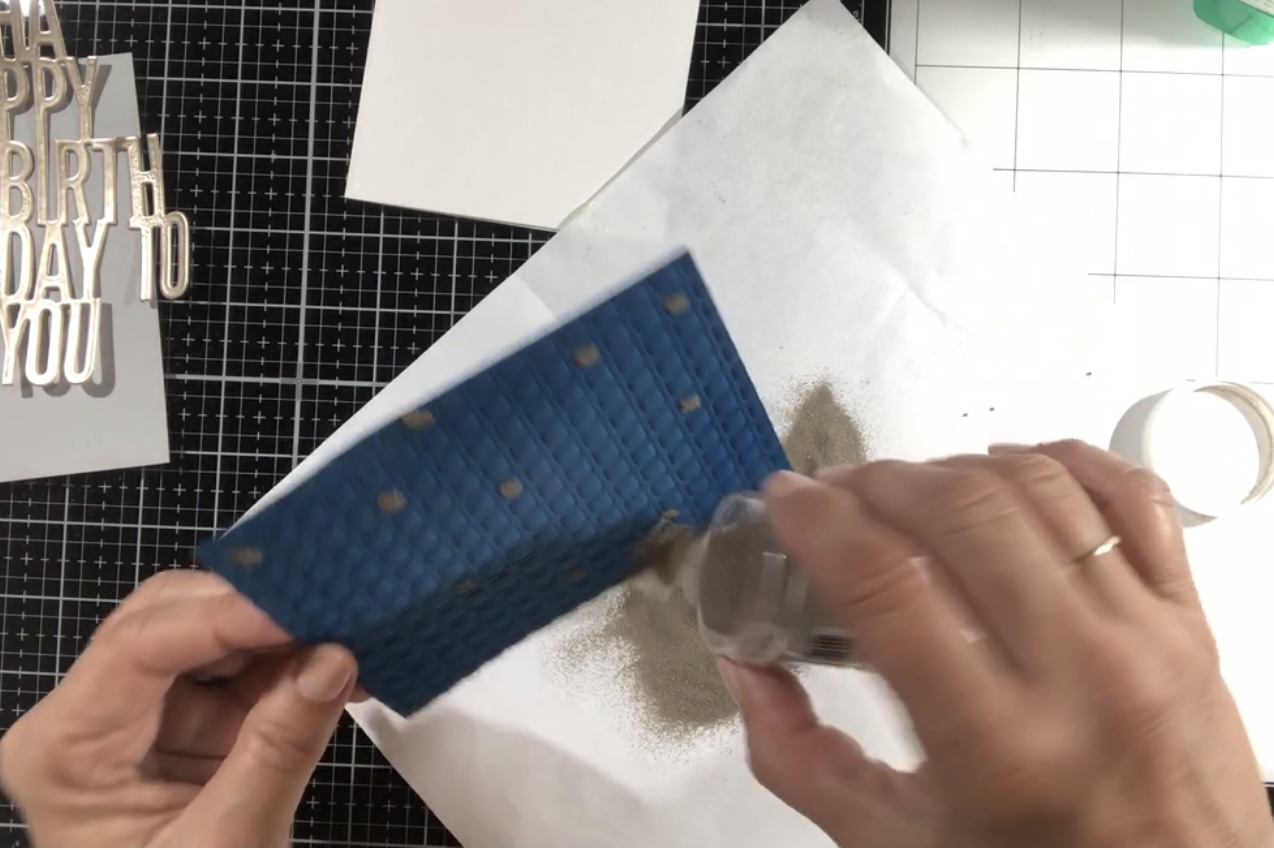
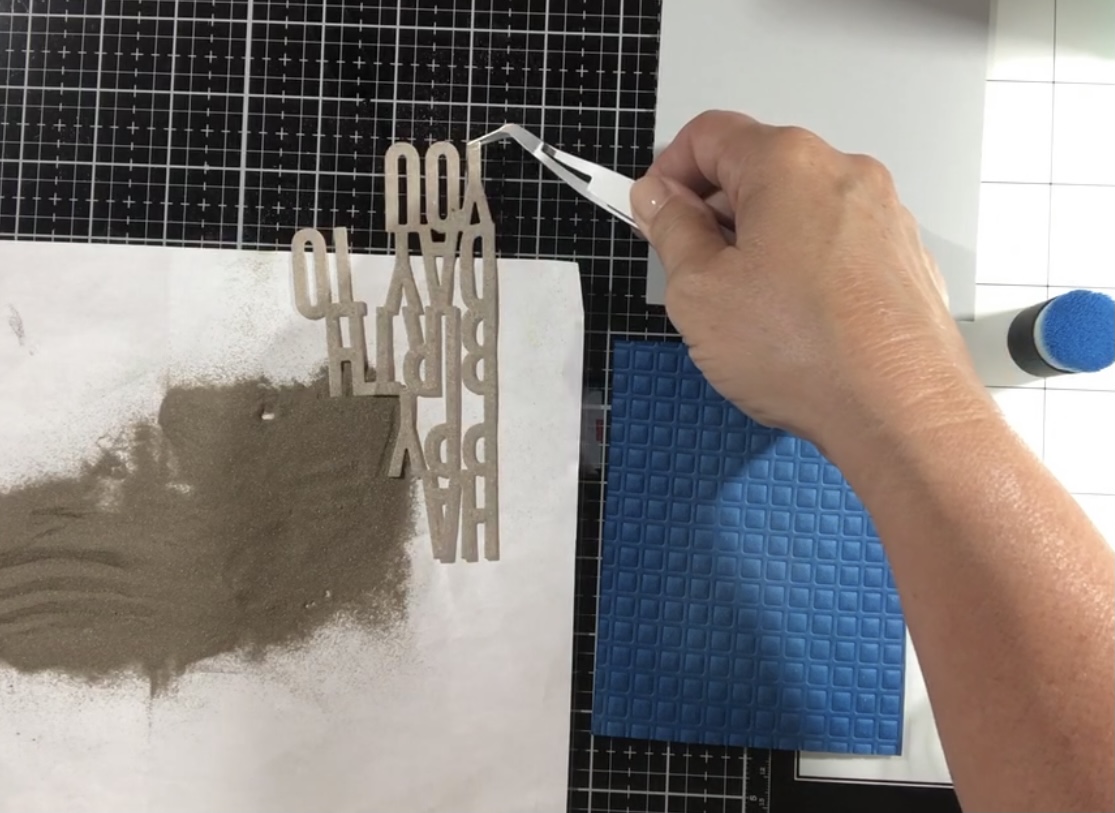
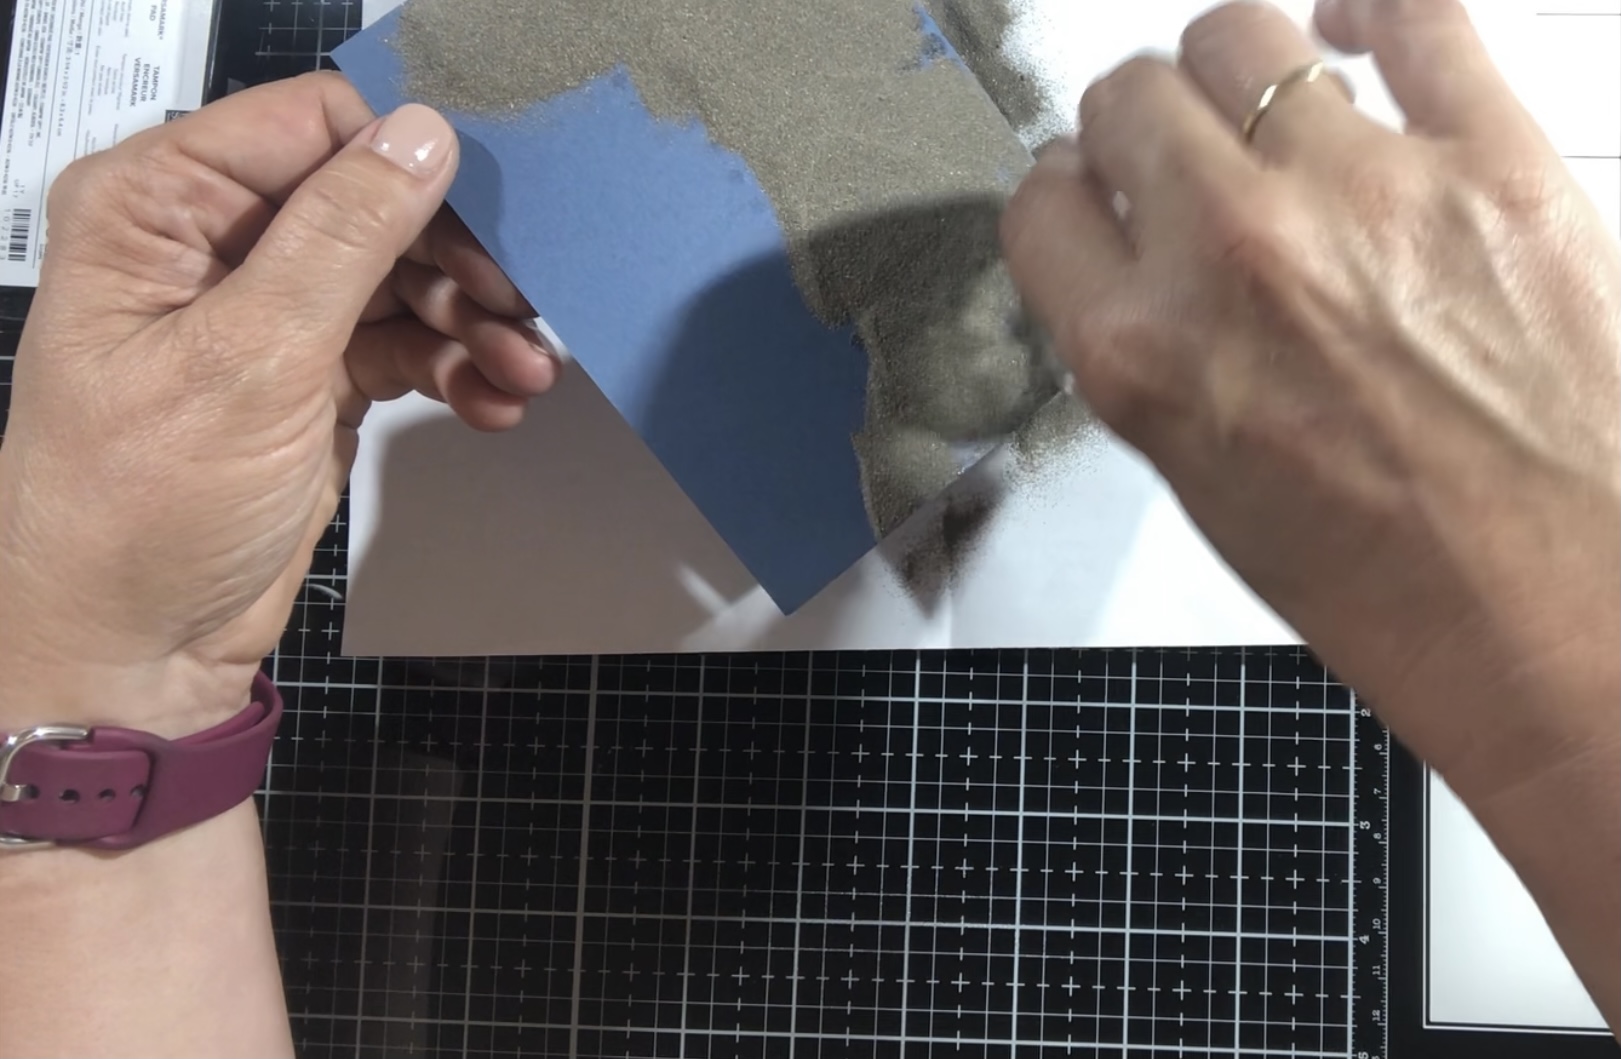
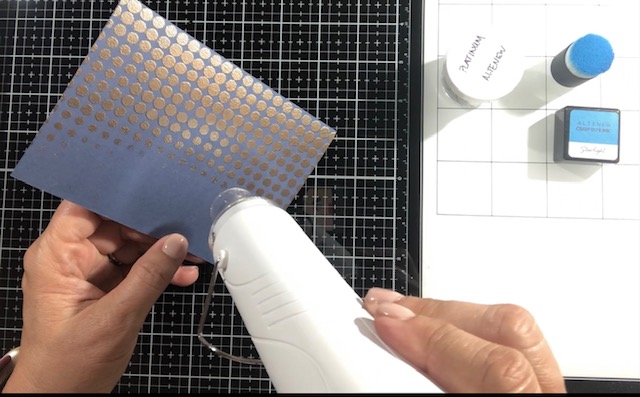
The HAPPY BIRTHDAY TO YOU background employs a die cut but the embossing pad is used instead of the cutting plate to create an embossed panel rather than cutting out all of those little squares from the Altenew Grid Cover Die. I used a Ranger Emboss It Pen and randomly colored an assortment of the raised squares and then heat embossed with Altenew's Platinum Embossing Powder. The sentiment is the metallic focal point and just jumps to life. I applied Versa Mark Embossing ink directly onto the die cut sentiment and then heat embossed it with the Platinum embossing powder as well. I repeated this process twice to get a nice smooth finish. I then attached the panel to an A2 Neenah Solar White 110# card base and glued on the sentiment. This card provides so much visual impact – I cannot wait to send this to a loved one.
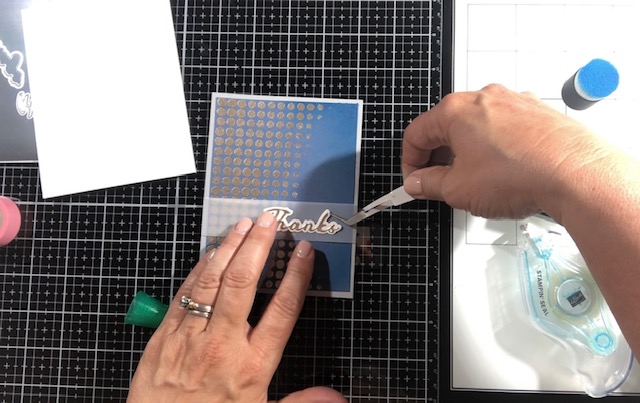
My fourth card which is THANKS, was designed by applying Versa Mark Embossing Ink directly over Altenew's Halftone Stencil onto my navy cardstock; I applied the ink in an arched shape. Next I heat set Altenew's Platinum Embossing Powder onto the stamped area to create this stunning metallic arch of circles. I ink blended the edges of the card with Altenew's Starlight Dye Ink. I also applied Versa Mark ink directly onto a small scrap of white card stock and heat set that with the same platinum embossing powder. From this, I die cut the Thanks sentiment from Altenew's Simple Greetings Die Set and cut the shadow die from white cardstock. Next I trimmed down the navy embossed panel to 4″x5.25″ and glued that to a 4.25″x5.5″ gray cardstock panel. I then cut a 1″ wide piece of vellum and wrapped it around the panel and attached with adhesive tape to the back of the panel. Tip: this allows you to avoid having adhesive show through your vellum. I then glued my die cut sentiment to the vellum and attached the panel to an A2 Neenah Solar White 110# card base.
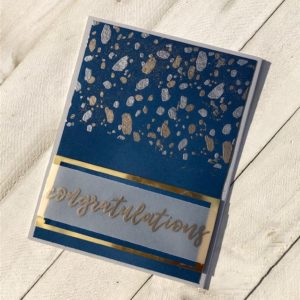
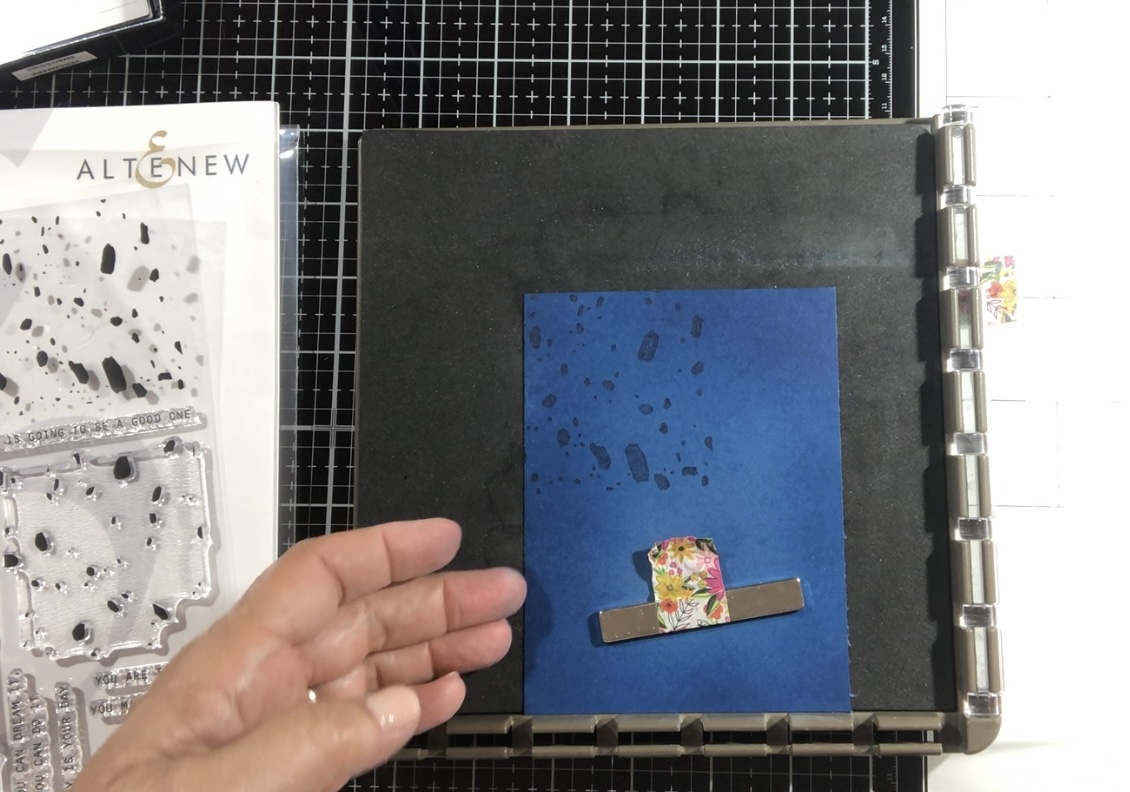
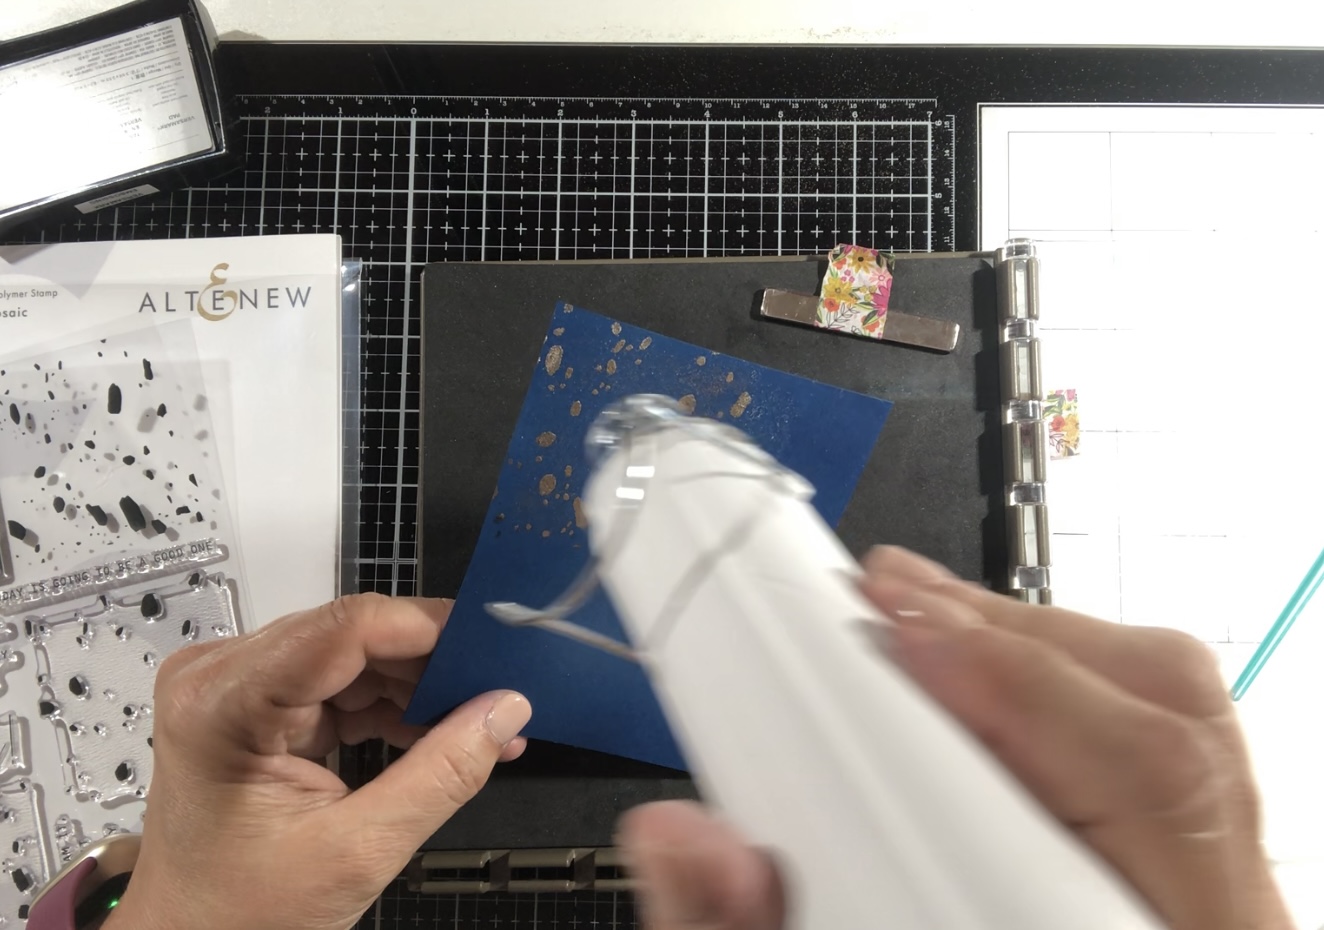
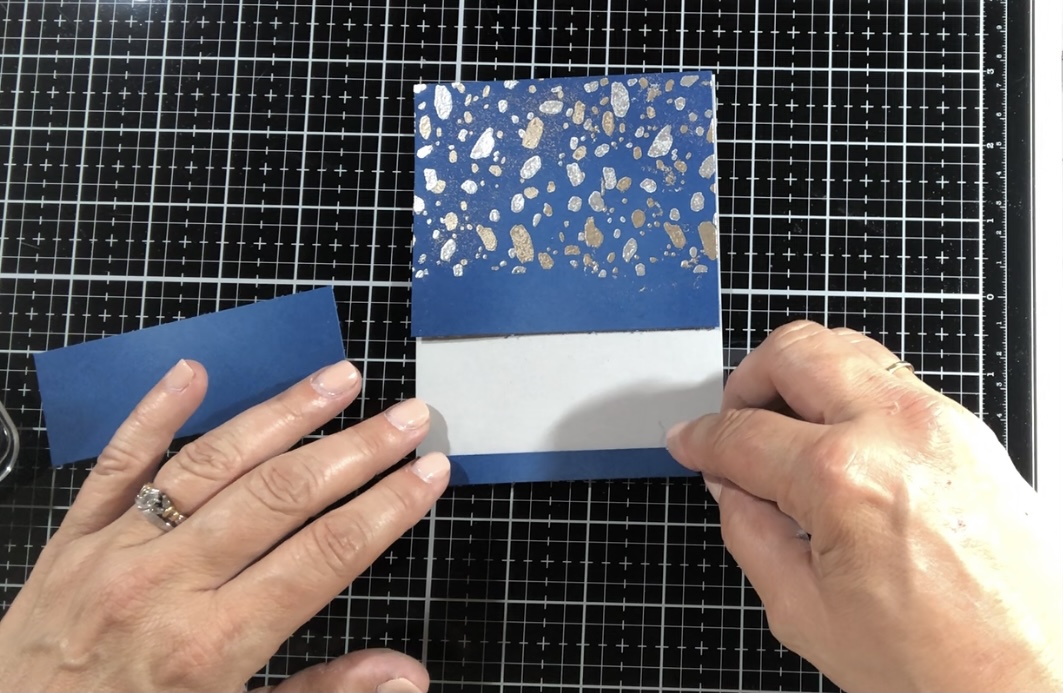
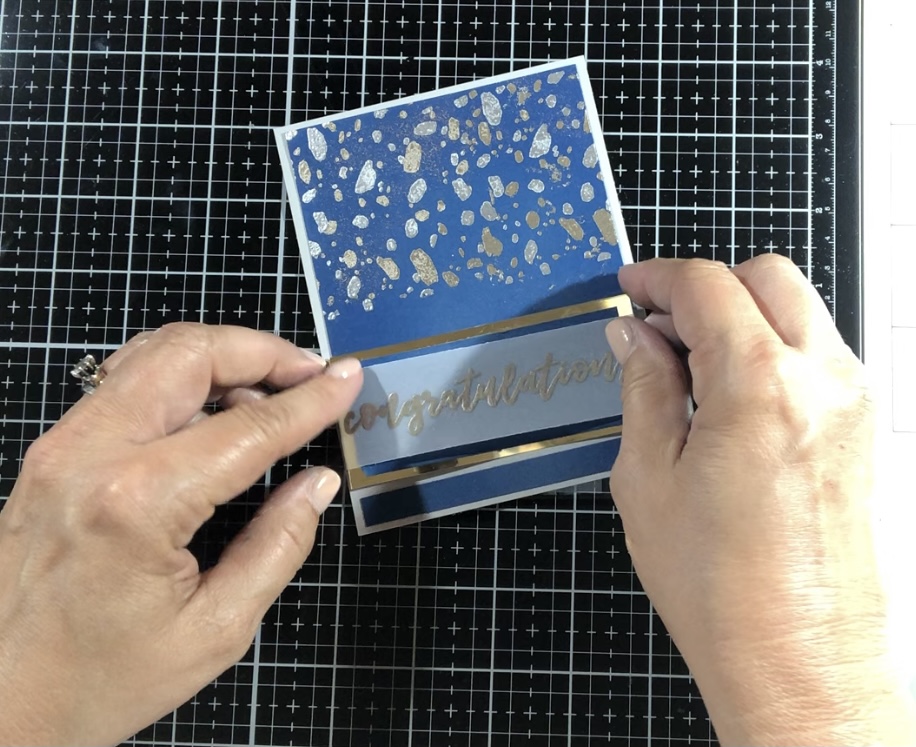
The final card in my masculine card set is the CONGRATULATIONS card. It is the perfect way to let someone special know how proud you are of them. I used the second and third layer stamps from Altenew's Stone Mosaic Stamp Set to create a beautiful metallic stone mosaic in Altenew's Pewter and Antique Silver Embossing Powder. The first layer stamp was used for the pewter stones and the third layer stamp was used for the antique silver heat embossed stones. Once the heat embossing was complete I ink blended the 4″x5.25″ navy cardstock panel with the same Starlight ink I have used on the other cards. Next I cut a 1.5″ section of the card stock out 3/8″ from the bottom of the panel. I glued the top and bottom pieces of the panel onto a 4.25″x5.5″ gray cardstock panel. Using the gold cardstock panel remaining from the YOU CAN DO ANYTHING card, I cut a 1.75″x4″ panel to which I glued the remaining blue cardstock. I cut a 1.25″ vellum strip and stamped the Congratulations Sentiment from Altenew's Bundle of Joy Stamp Set and heat set it with the Platinum embossing powder. I attached the vellum to the Sentiment panel by adhering on the back of the panel and popped up the Sentiment Panel with Altenew's foam tape to give it dimension. The entire panel was then glued to an A2 Neenah Solar White 100# card base.masculine
Lastly, to package this stunning masculine card set I used my recycled element as the base of the card holder. I used the cardboard enclosure that my 12″x12″ Misti came in. I also used cardstock that I had in my paper stash.
My card package is a refillable card dispenser so it can be reused once the 5 cards have been used.
I will not go into the step by step instructions here, you can refer back to the Feminine Card Set blogfor those. I used the same gray cardstock for the strips and used a metallic scalloped cardstock for the bottom panels.
This project, in conjunction with the feminine card set was so intensive but I enjoyed testing my creativity. I truly hope these cards will provide inspiration and spark excitement and joy in your life and those you create for. Wish me luck on moving on to Level 2. As always, thank you for stopping by.
Jackie
8 thoughts on “AECP Level 1 Final Challenge – Masculine Card Set”


These are absolutely gorgeous!
Thank you so much Laura!
These are beautiful! You are incredibly talented!
Thank you Jen – I greatly appreciate the compliment!
These are fantastic! Great job!
These are beautiful. You’re doing a great job!
These look amazing! The color and the shine look perfect. Thank you for submitting your work to the AECP assignment gallery.
Thank you so very much Erum!